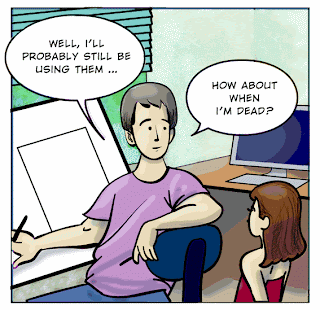
I am in the process of planning a webcomic called “My Life In the Trenches” which is slated to launch sometime in the early Fall 2009. To that end, I have been exploring an efficient workflow so that this doesn’t become a chore.
For now, I’m working digitally from start to finish. At this writing, I’m awaiting shipment of the new Wacom Intuos4 and anticipate productivity and speed gains. Look for a video review here soon. In this case study I’m using a Cintiq.
Step 1: Sketching with the Photoshop Pencil tool, the layout is roughed in at 300 d.p.i.

Step 2: Import the Photoshop sketch into Illustrator as a template, making composition adjustments as needed. The Brush tool in Illustrator yields the line quality and pressure sensitivity I prefer.

Step 3. Using the free Multi-fill Photoshop plug-in from Boudewijn Pelt, instant “flatting” of color is possible with random colors. This plug-in prefers that all shapes be closed, which is at odds with my loose drawing style, so I must take care to close gaps. I may re-think this compromise, or learn to refine the plug-in’s behavior.

Step 4: While step 3 is great fun, I select my desired colors and start building a palette (.ACO) file. 
Step 5: Shading and modeling – without fuss – plus some special effects if appropriate, and we’re done. This step took only a few minutes.

Conclusion: While the Illustrator Brush tool yields satisfactory results, it is taking more time than I would like. To be specific, using a stylus to tweak Bezier points has always been a pain – literally. It’s my goal to be able to keep the entire process in Photoshop in the next exploration.
[EDIT] My follow-up to this process is posted here.


